Product Photography with iPhone: AI vs. Old-School Techniques
9 April, 2024
Forget fancy studios, expensive equipment, and complicated lighting setups! In the age of the ever-evolving iPhone, you can be a product photography whiz with just the device in your pocket and a dash of know-how. But with the rise of AI-powered photo editing tools, a question emerges: should you embrace the automated magic or stick to the tried-and-true techniques of yesteryear?
This article explores both the AI revolution and the enduring charm of old-school methods when it comes to product photography with your iPhone. We'll compare the ease and speed of AI editing with the granular control and creative freedom of manual techniques.
So, whether you're a well-experienced product photographer looking to streamline your workflow or a complete beginner eager to capture stunning product shots, buckle up! This journey will equip you with the knowledge and skills to take your iPhone product photography to the next level, regardless of your chosen approach.
Is it possible to get professional-looking product photos with iPhone?
Professional-looking product photos no longer require expensive equipment and a photography degree. Thanks to the ever-evolving cameras and powerful editing tools on your iPhone, capturing stunning product shots is more accessible than ever. But the age-old question remains: can you truly achieve professional-quality results with just your phone?
Hold onto your hats, because the answer is a resounding YES… with a twist.
While it's true that professional photographers often utilize high-end cameras and lighting setups for a reason, they also possess years of experience, keen eyes for detail, and the mastery of intricate editing techniques. Simply owning an iPhone doesn't automatically grant you those superpowers.
However, with the right knowledge, tools, and a dash of creativity, you can absolutely achieve product photos that rival (and even surpass!) some studio work. Here's why:
-
iPhone cameras are no slouches: Modern iPhones boast impressive camera technology, capturing crisp details, vibrant colors, and beautiful bokeh effects. With features like Portrait mode and Live Photos, you can create depth and dynamism that were once exclusive to professional setups.
-
Editing magic at your fingertips: Gone are the days of clunky editing software. Apps like Zoomerang, Lightroom Mobile, and Photoshop Express offer a treasure trove of tools for adjusting lighting, exposure, white balance, and even removing unwanted elements when it comes to videos and photos. With a bit of practice, you can achieve professional-looking edits without needing a computer.

- Lighting is key: This, however, is where the "twist" comes in. While your iPhone can do wonders, lighting remains the cornerstone of professional product photography. Natural light diffused through a window works wonders, but for more control, consider investing in affordable lighting kits or reflectors. Trust us, good lighting will elevate your photos like nothing else.
So, can you achieve professional-looking product photos with your iPhone? The answer is a resounding yes, but remember, it's not just about the equipment. It's about understanding the fundamentals, embracing your creativity, and putting in the practice. So, grab your iPhone, unleash your inner artist, and get ready to create product photos that will wow the world!
Product Photography with AI: How to put your product in hundreds of scenes in minutes?
Imagine this: you need fresh product visuals for your next social media campaign, but a traditional photoshoot just isn't in the cards. Time constraints, budget limitations, or maybe even that elusive perfect location – whatever the hurdle, Zoomerang's AI Photoshoot Generator is here to be your hero.
This revolutionary feature utilizes the power of AI to transform product photography. Forget expensive studios and lengthy shoots. With Zoomerang, you can be your own creative director, conjuring up a stunning array of product scenes – all within minutes.
Here's how it works:
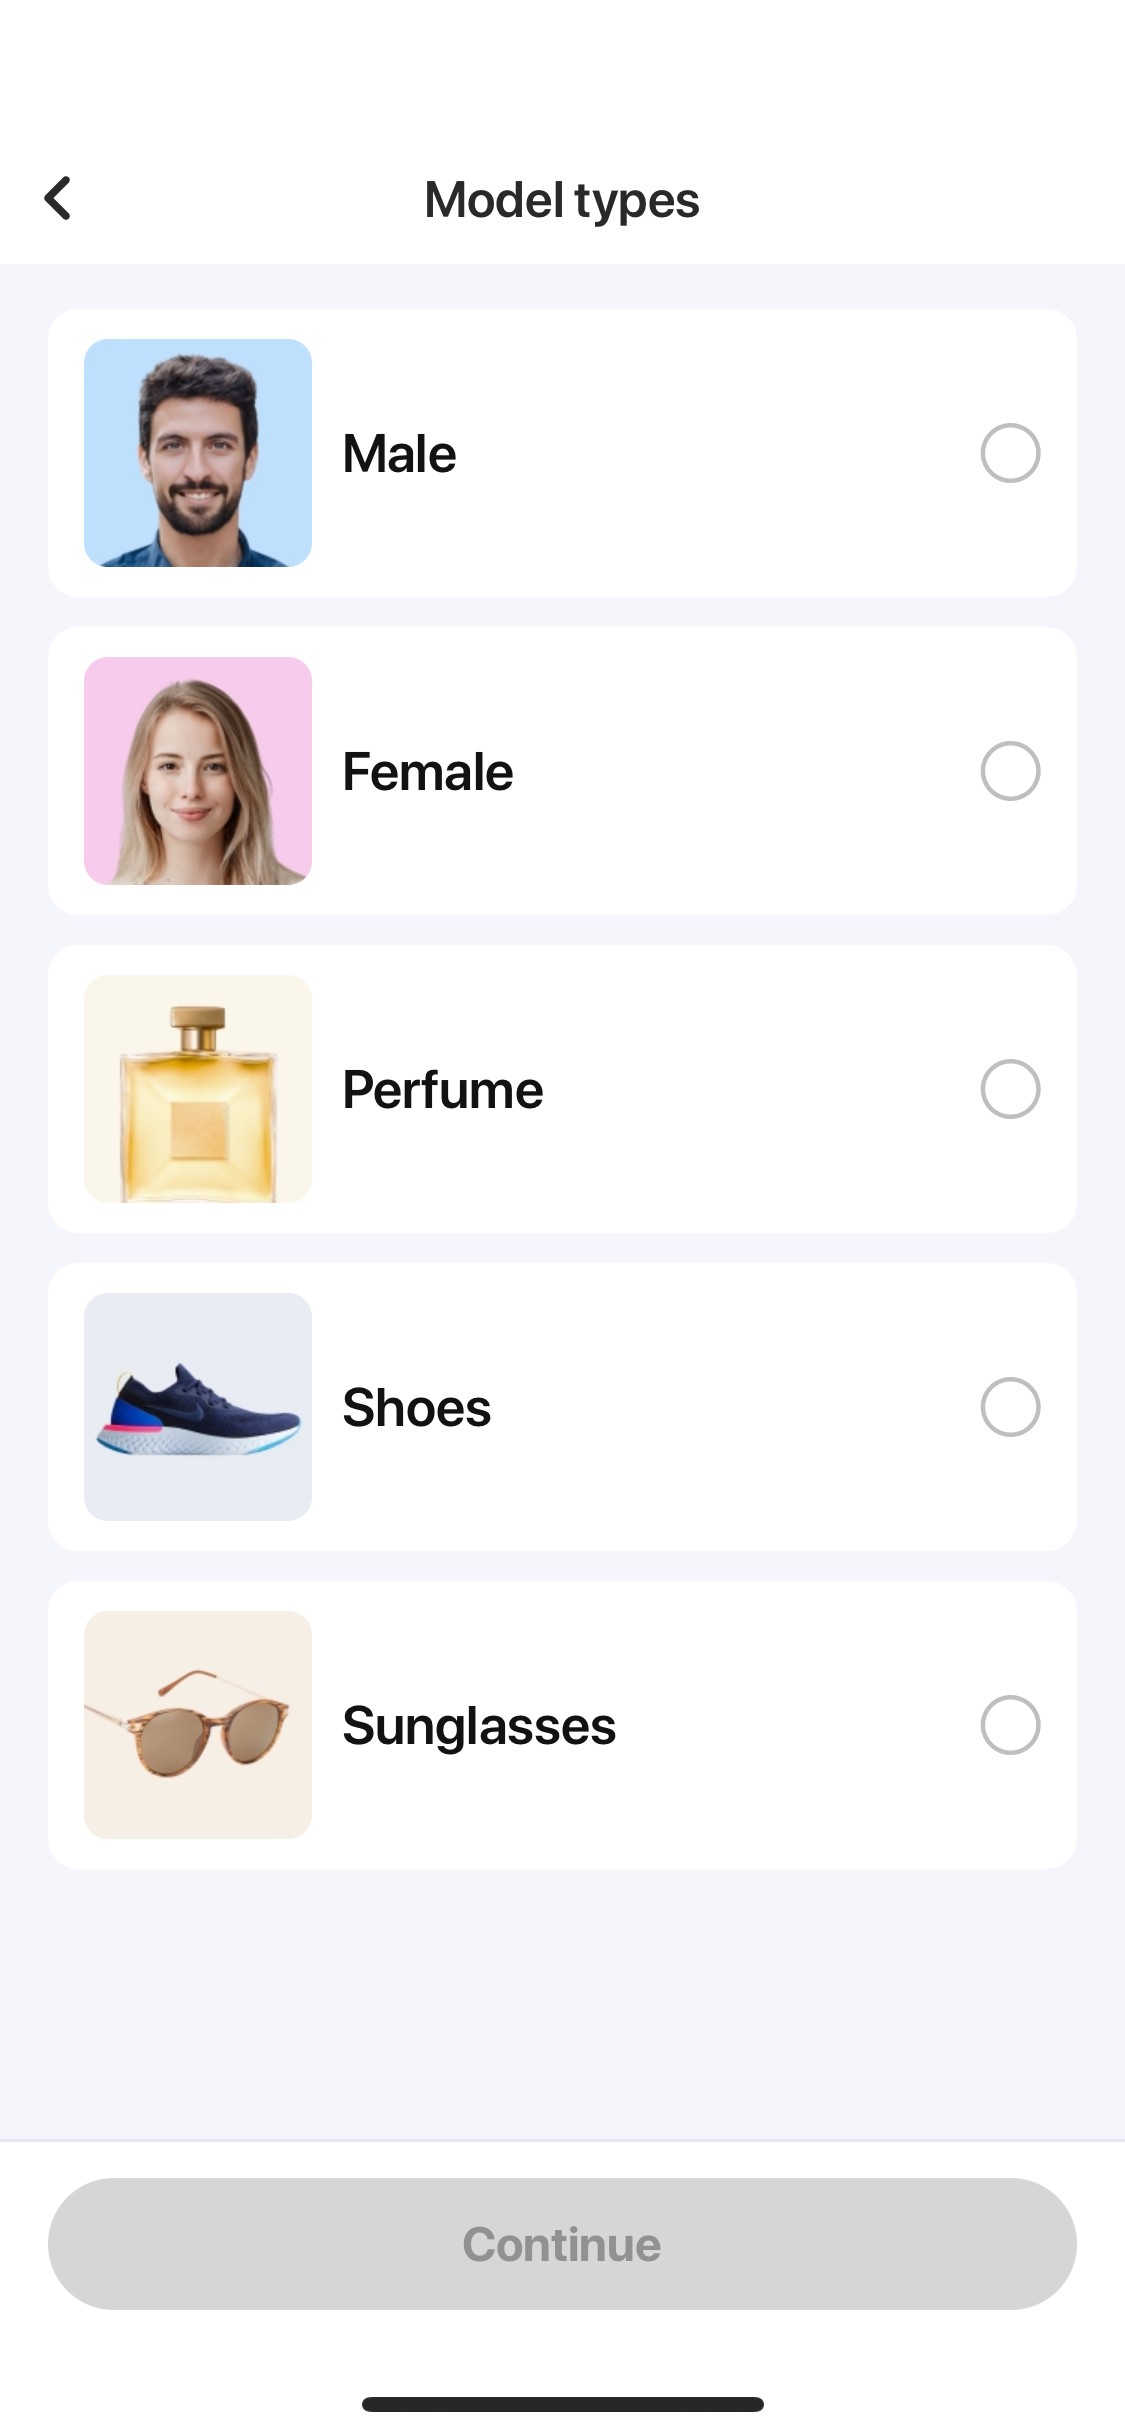
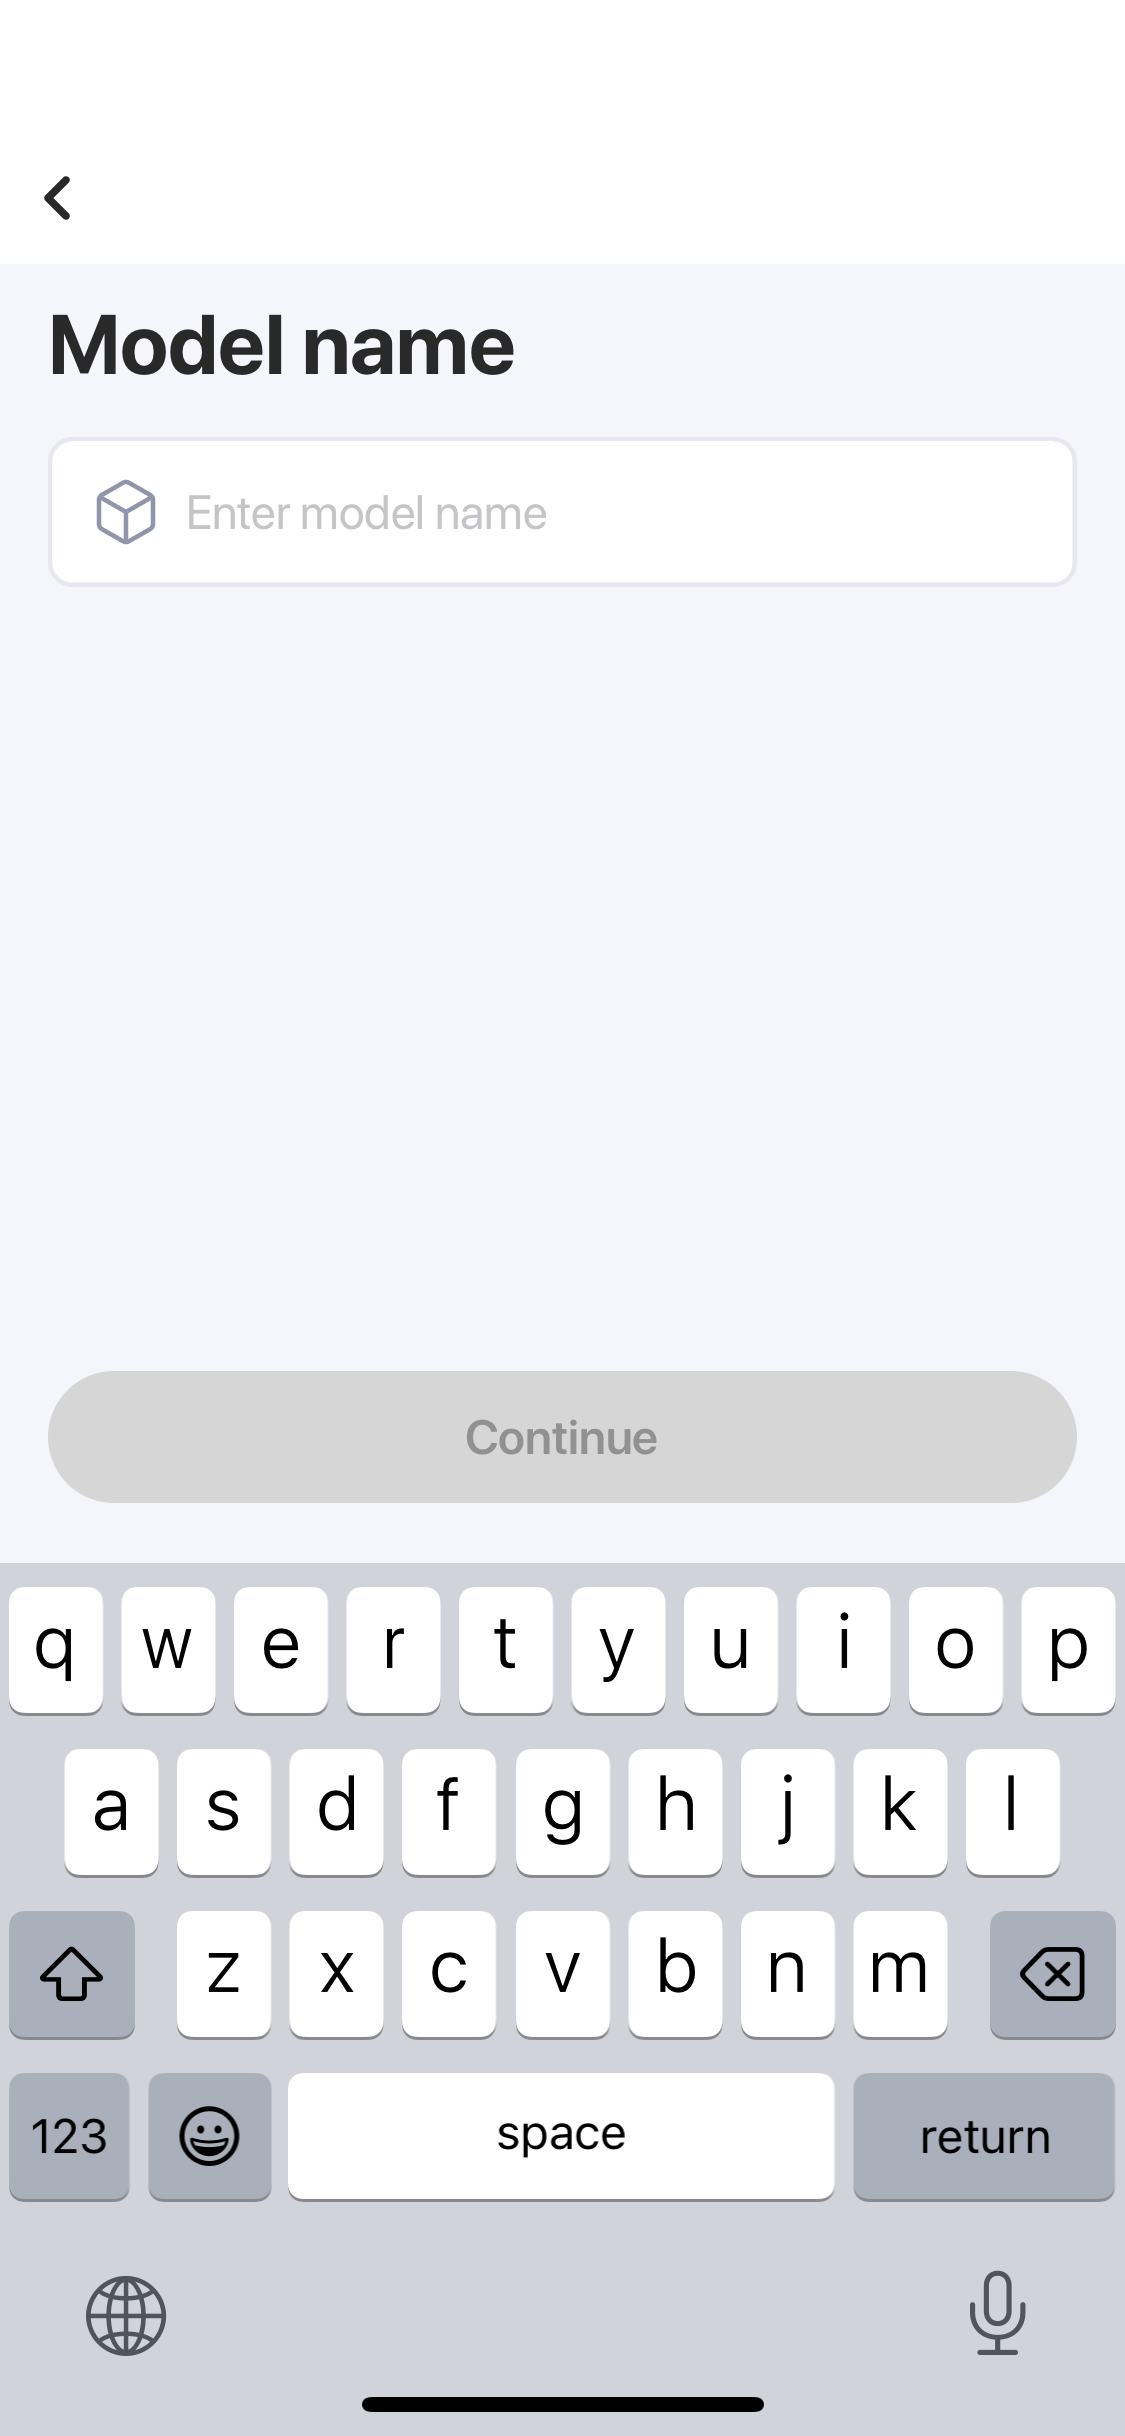
- Train Your AI Model: Zoomerang offers two model types: "Product" and "Individual." Simply select the one that best suits your needs.
- Upload the Magic Ingredient: Next, upload a handful of high-quality images of your product. These will act as the building blocks for your AI muse.
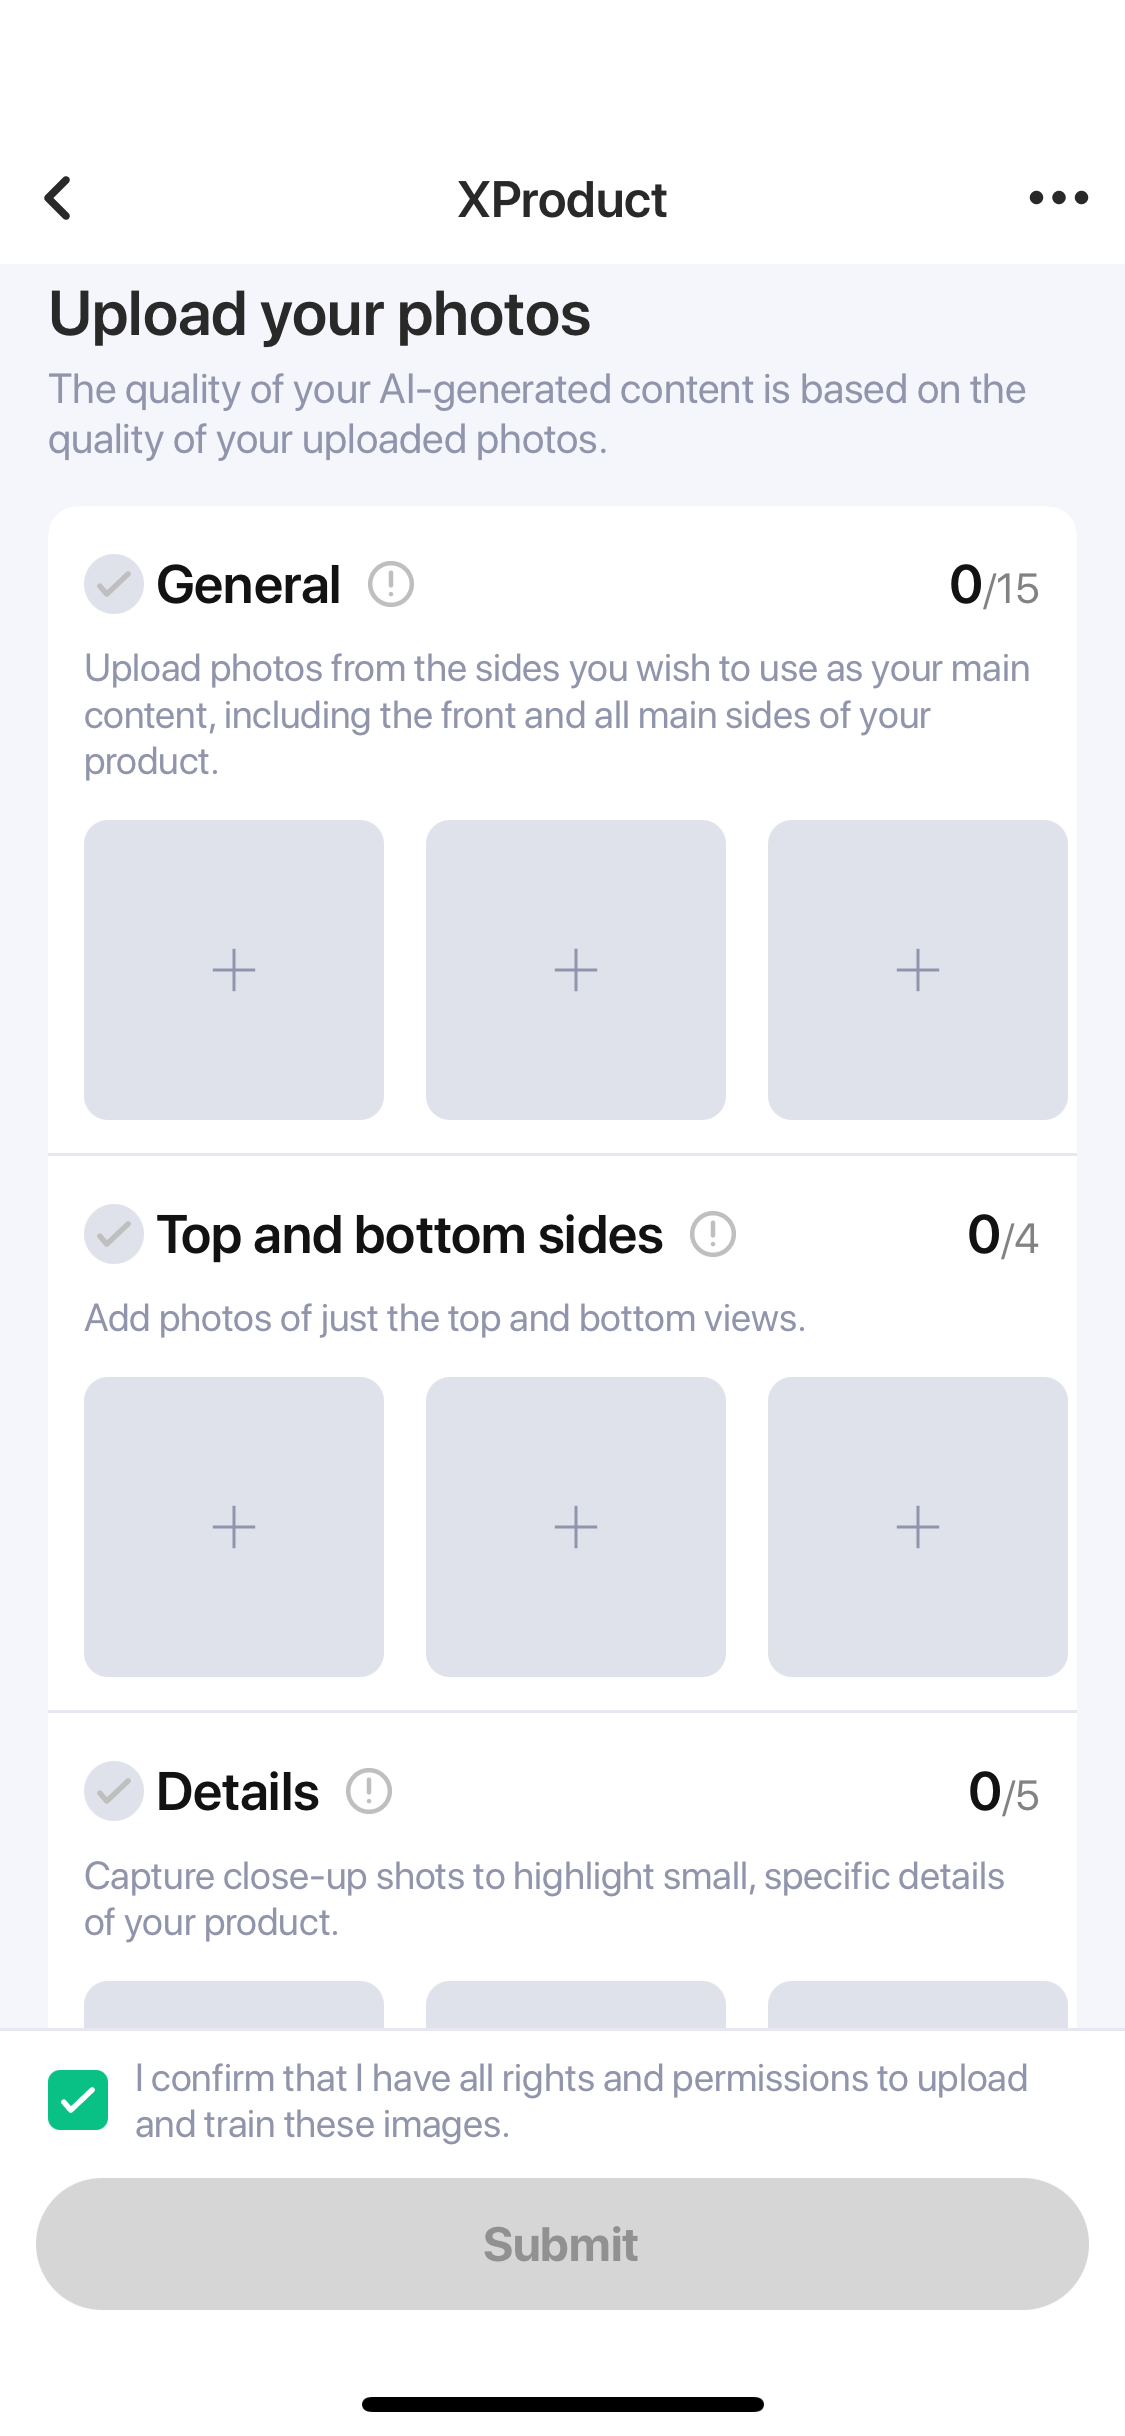
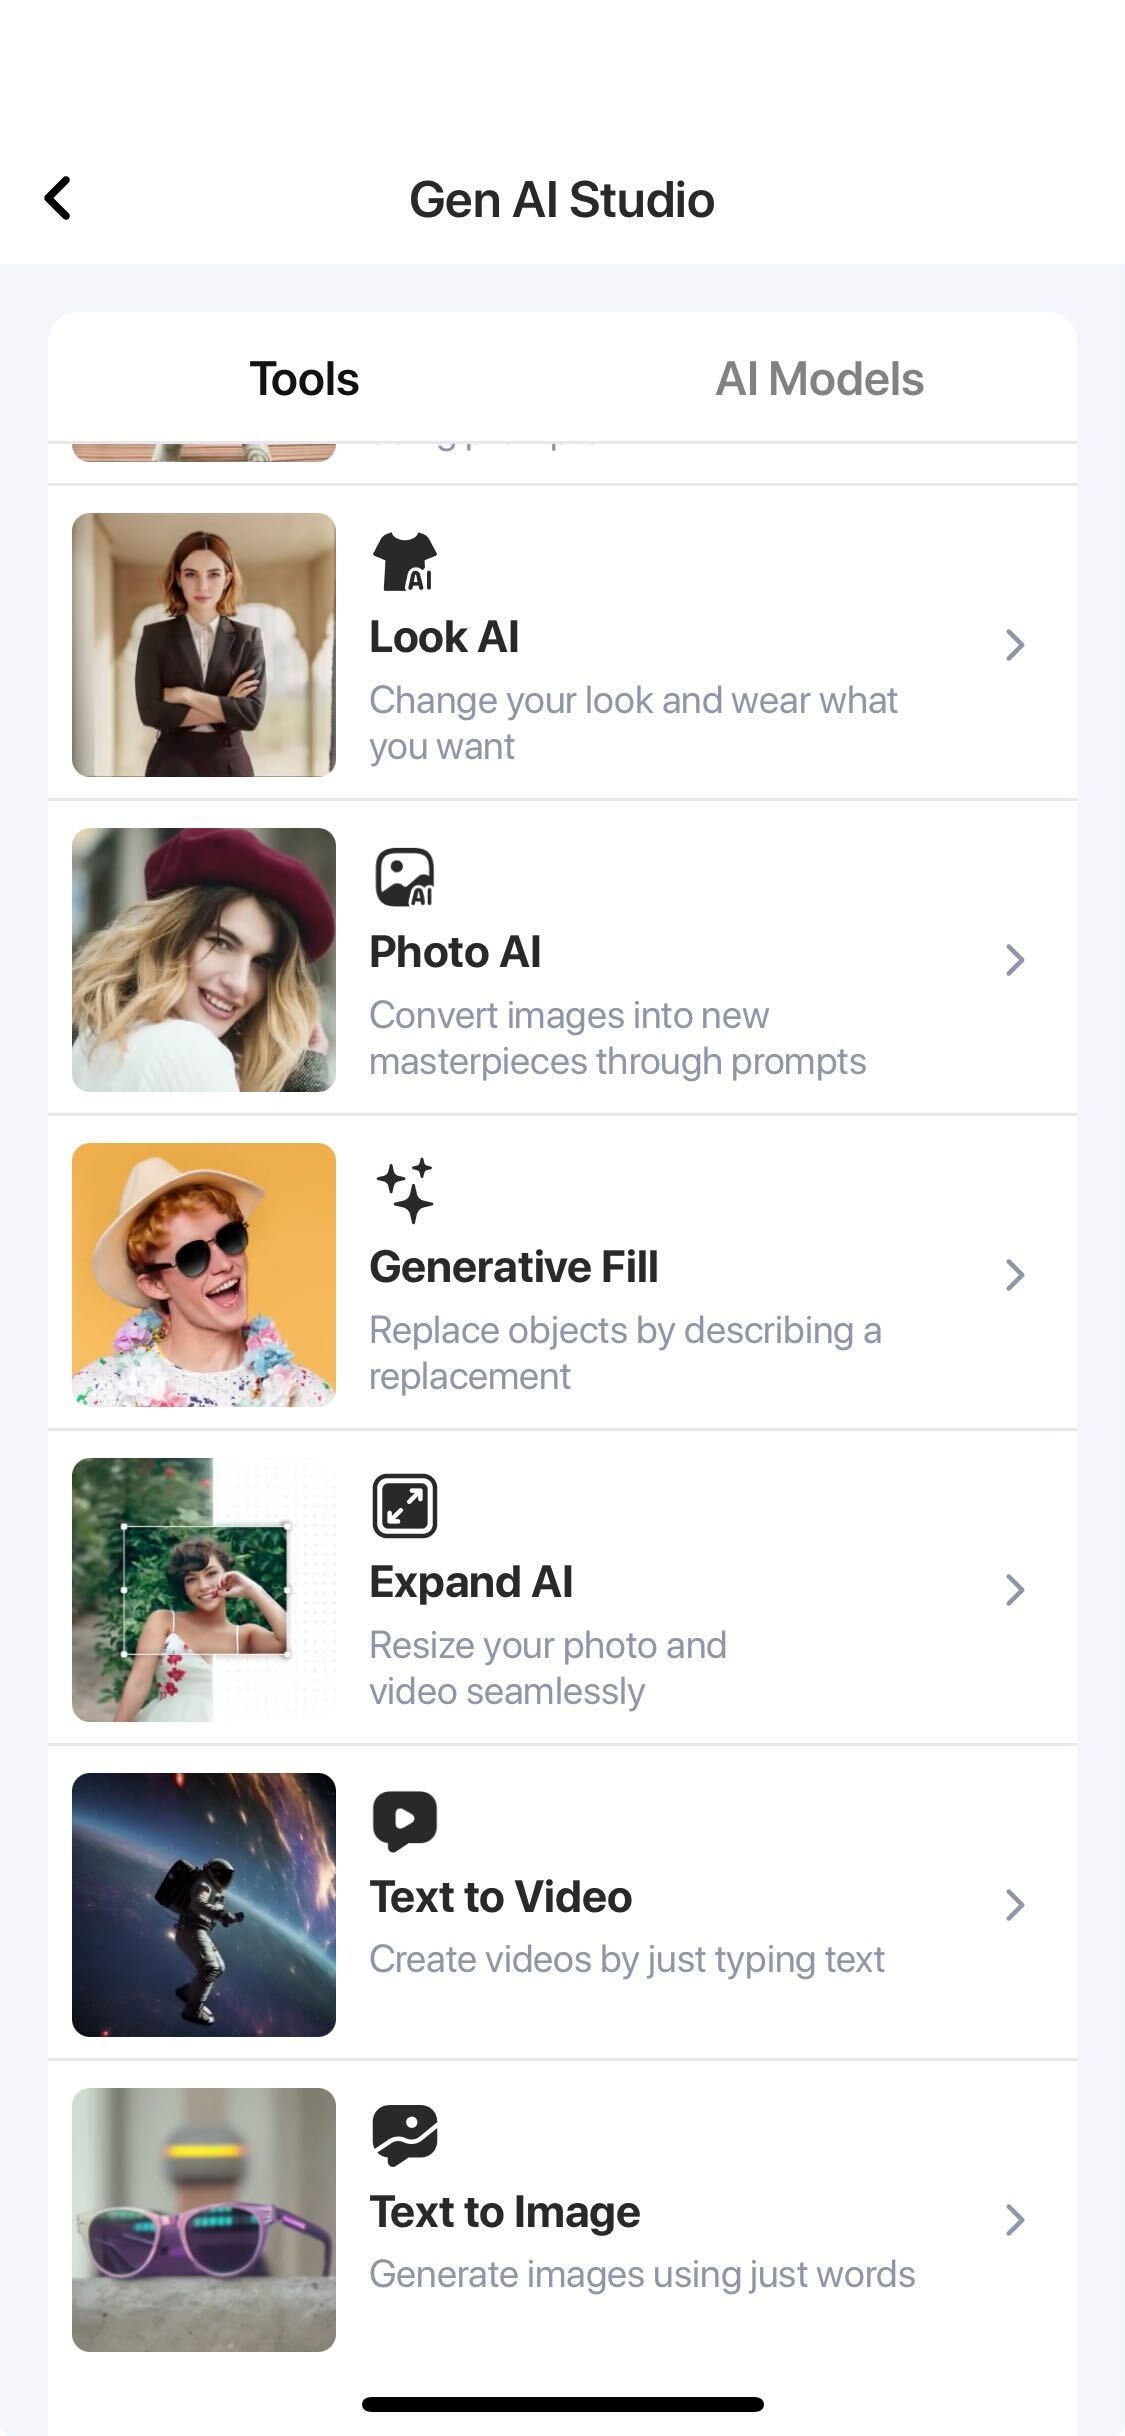
- The AI Artist Takes the Stage: Hit "Start Generation," and let Zoomerang's AI work its magic. It will analyze your product photos and learn its unique characteristics. Then, prepare to be amazed as your AI model starts churning out a seemingly endless stream of product scenes – photorealistic, 3D, 2D, and more – showcasing your product in a variety of settings with an uncanny 99% likeness.
Zoomerang doesn't just save you time and money; it unlocks a whole new level of creative freedom. Imagine showcasing your sneakers on a bustling city street, your perfume bottle basking on a tropical beach, or your bag gracing the arm of a fashion icon – all without ever leaving your desk.
This is the future of content creation. Zoomerang empowers you to "Create Once, Use Twice." Train your AI model just once, and then use it to generate a limitless library of product visuals that will keep your social media feed fresh and engaging. So, ditch the limitations and unleash your inner creative director with Zoomerang's AI Photoshoot Generator. The only limit is your imagination.
3 steps to take product photos with your iPhone the traditional way
The allure of AI-powered photo editing is undeniable, but there's something special about capturing stunning product photos the traditional way with your iPhone. It's a journey of creative exploration, technical know-how, and the satisfaction of achieving picture-perfect results through your own skill and vision.
- Master the Art of Natural Light: Forget fancy studio setups. Embrace the power of natural light! Find a well-lit space with large windows or step outside on an overcast day to diffuse harsh sunlight. Experiment with different angles to create soft shadows and highlights that enhance your product's texture and dimension. Remember, natural light is your best friend for creating natural-looking and eye-catching photos.

- Composition Counts: Don't just snap and go! Think about the message you want your photo to convey and arrange your product accordingly. Use the rule of thirds for balanced composition, play with negative space to make your product pop, and incorporate leading lines to draw the viewer's eye towards the star of the show. Remember, a well-composed shot tells a story without needing words.

- Editing Magic: Don't underestimate the power of editing tools! Apps like Zoomerang offer a treasure trove of options for fine-tuning your videos and photos.
Bonus Tip: Invest in a few simple tools to elevate your game. A tripod ensures stability for sharp shots, while diffusers soften harsh light. Reflectors bounce light to brighten shadows, and backdrops add variety and professionalism.
How to edit product photos?
You've snapped some amazing product photos with your iPhone, capturing the perfect lighting and composition. Now, it's time to elevate them further with the magic of editing! But with countless apps and options available, where do you even begin? Worry not, aspiring product photographer, for this guide will equip you with the essential editing techniques to transform your photos from good to breathtaking.
Choose Your Weapon (App, that is!)
While options abound, some popular choices for iPhone photo editing include:
- Free & User-Friendly: Snapseed, Lightroom Mobile, and VSCO offer a user-friendly interface and a good range of basic editing tools, perfect for beginners.
- More Control, More Complexity: If you're comfortable with slightly more complex interfaces, Adobe Photoshop Express and Pixelmator offer advanced features like layer editing and selective adjustments.
Basic Enhancements, Big Impact
Start with these fundamental edits to lay the groundwork:
- Exposure & Contrast: Adjust exposure for brightness and contrast for definition. Aim for a balanced yet eye-catching image.
- White Balance: Ensure accurate color representation by correcting white balance, especially if using artificial lighting.
- Highlights & Shadows: Fine-tune highlights to avoid blown-out whites and shadows for richer detail.
- Sharpening: Add a touch of sharpening to enhance crispness, especially for close-up shots.
Level Up with Creative Tweaks
Now, let's add some personality:
- Selective Adjustments: Highlight specific areas of your product using tools like brushes or gradients.
- Curves: For more precise control over color and contrast, explore the Curves tool.
- Clarity & Vibrance: Add subtle clarity for detail and vibrance for richer colors, but avoid overdoing it.
- Cropping & Straightening: Ensure your product is centered and the composition is balanced.
Don't Forget the Details
- Remove unwanted elements: Dust specks, fingerprints, or background clutter can be easily removed with healing tools.
- Background Adjustments: Blur or replace the background for a cleaner look or more creative effect.
- Text & Overlays: Add subtle text overlays or watermarks for branding or information.
Bonus Tip: Consistency is key! Develop a signature editing style for your brand by using similar presets or adjustments across your photos.

FAQ
How to take product photos with a white background?
- Find a well-lit space: Natural light diffused through a window is ideal. If using artificial light, choose a softbox for even illumination.
- Set up your background: Use a large white sheet, foam board, or backdrop specifically designed for product photography. Ensure it's wrinkle-free and seamless.
- Position your product: Place your product on a platform or stand in front of the background, leaving some space between them. You can use tape or clips to secure it.
- Capture your photos: Experiment with different angles and distances to achieve the desired composition. Use the gridlines in your camera app for balanced framing.
- Edit for perfection: Use apps like Snapseed or Lightroom Mobile to adjust exposure, white balance, and shadows. You can also crop and refine the background for a clean, professional look.
How to take clothing product photos?
- Use a model or mannequin: This helps showcase the fit and drape of the clothing. For flat lays, use a wrinkle-free surface and arrange the garment naturally.
- Pay attention to lighting: Soft, diffused light is key to avoid harsh shadows. Experiment with different angles to highlight details like textures and embellishments.
- Iron out wrinkles: Ensure your clothing is wrinkle-free for a polished look.
- Edit strategically: Use editing tools to adjust brightness, contrast, and white balance. You can also use tools like clarity and vibrance to enhance details and colors.
Is there a way to automate and scale product photography with AI?
Yes, some AI tools offer automation and scalability for product photography. You can upload multiple product photos and generate variations in different scenes with just a few clicks. While they might not replace the artistic touch of traditional photography, they can be a valuable tool for creating high-volume product visuals efficiently.
 Sargis Avagyan